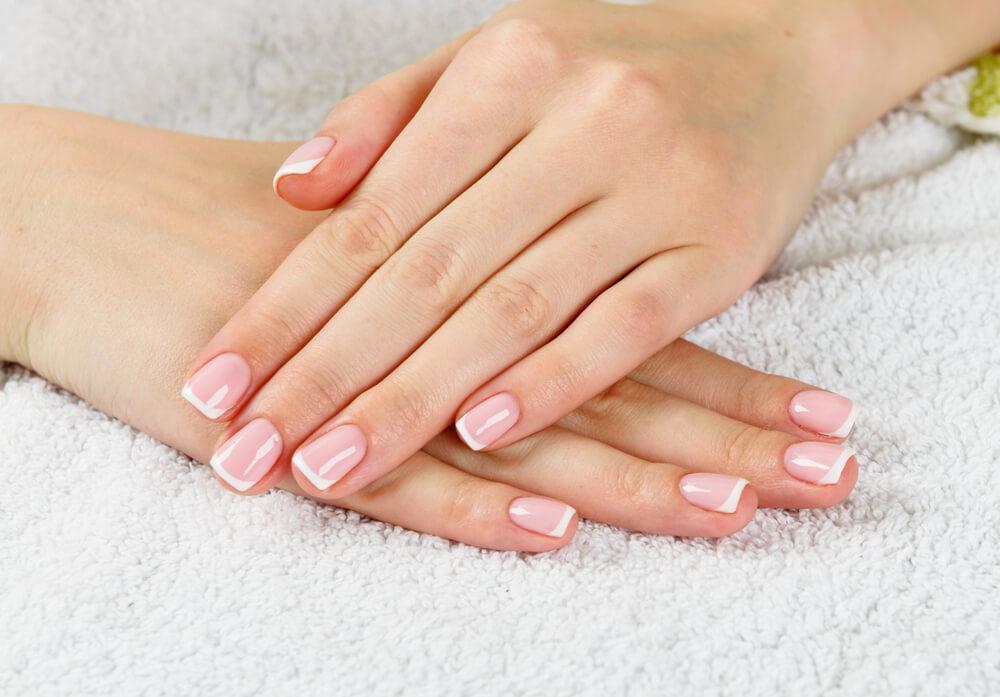
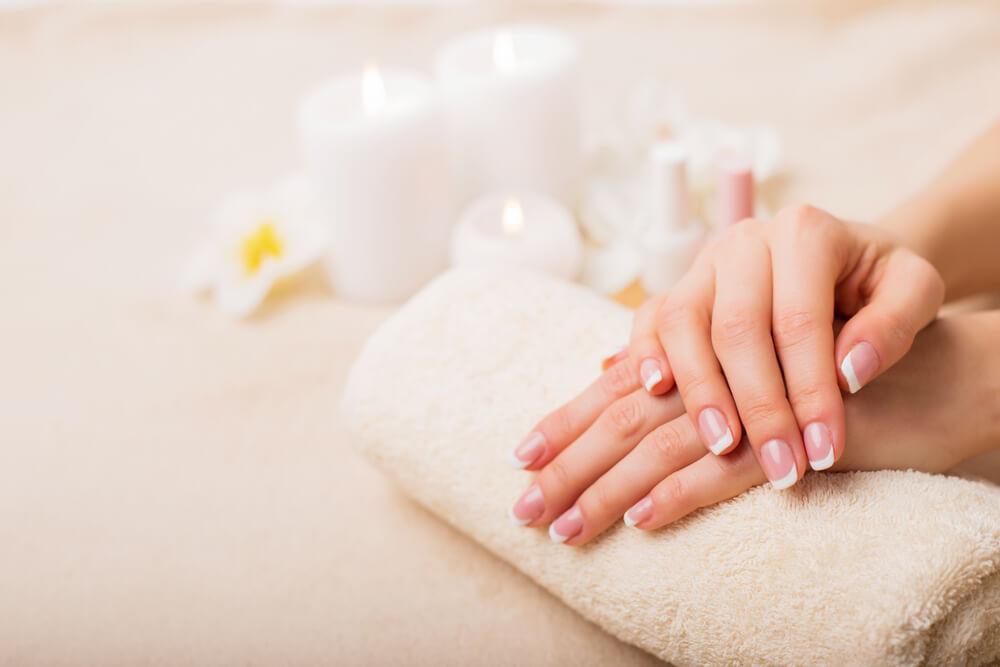
Trends may come and go, but the classic ones stick around. French manicure is a perfect example of a nail design whose luster is never fading. As it stands, the manicure gets better with some little tweaks that work to make it even fancier.
It is even cooler if you are also caught up in the trendy DIY craze;doing your own nails adds some oomph since you can play with the design to fit your desired finish.Irrespective of where it takes place, the French manicure is a great fit. The question is; how do you make yours stand out from the rest? Keep reading to learn how to do the perfect French manicure.
Why is it called a French Manicure?
The history of the French manicure is a hard one to trace. Some people say it originated from France in 1800 while others say it was Max Factor’s invention in 1930. The invention is said to be Factor’s solution to Paris Fashionista’s over-moisturized hands.
The Paris fashionistas’ goal was polished nails that would match their wardrobe. Jeff Pink, the founder of Orly, an American cosmetics firm in 1978 trademarked the original French Manicure. The trademark first appeared on a French manicure home kit.
How to Do it Perfectly
Is there anything French about the French manicure? Hack the simple yet sophisticated white tipped, pale pink look on your nails by following the steps below.
The Preparation Stage
- Start by cleaning your nail plate of any old polish using an acetone-free nail polish remover since acetone will make your nails brittle. If you have acrylics on. Don’t let the remover soak for long.
- Using a nail clipper, proceed to trim your nails to your desired size. For acrylics, cut the nails to fingertips, apply the glue and stick them on.
- Smoothen the edges of your nail by use of nail file and a nail buffer. Shape the edges into square, round or crescent-shape as you want them. Having achieved the desired shape, buff the nail surfaces too.

- Mix water with either olive oil or whole milk in a bowl and soak your hands for three minutes. Soaking softens your cuticles for comfortable pushing back. Towel-dry your hands when done.
- Time to push back your cuticles: avoid pulling or trimming of cuticles as it exposes your nails to infections. Consider massaging the skins with a little cuticle oil.
The Application Stage
- Apply a base coat
In French manicure, the base coat application is of vital importance since your natural nails will be visible. For a typical French manicure the base coat is usually clear, cream or pale pink. From the centre of your first nail, run a stripe down coupled by two others to the sideways.
With smooth, even strokes apply the base coat from the cuticles outwards. Repeat the procedure on all the fingernails. Give time for the base coat to dry completely. Otherwise, it will mess the whole process.
- Polish your nail tips white depending on your preferred shape example square or crescent-shape. Make sure the nail tip paint doesn’t go beyond the nail whites and that the paint matches your nail shape too. Use the Q-tip to wipe off excess polish.
- To achieve a more natural French manicure apply the over-top nail polish using a baby pink shade of polish.
- Add a clear top coat to seal and protect the manicure and make it long-lasting. Use the cuticle oil to keep the cuticles supple.
Invest in a French manicure tool kit. Present in the package is a tip color, excellent base color, together with all the necessary tools for a perfect finish. Purchase one for simplified application procedure.
Method 1: Use Tape
While it is not everyone who can pull a perfect nail tip shape, there are a few aids designed to help such people. These aids are rubber bands, band-aids, and tape. Scotch tape is, however, the best.
Applying the Base Coat
- Use a nail polish remover to wipe off any oils, moisturizers, old polish residue all of which affect the stickiness of the base coat on your nails.
- Settle for light pink or nude-toned base coat. Do the first coat on all your nails and then leave it to dry. Feel free to add another layer. Failure to let it dry will be manifest in peeling off of the base coat on the tape.
- To fasten the drying process, purchase a nail polish drying spray and spray the nails. Additionally, blow dry your nails with a blow drier which is in a cool setting.
Painting Perfect White Tips
- Use scotch tape pieces to cover about 3/4 of your nails. Scotch tapes rank the best because of its gentleness. You don’t have to worry about peeling off the base coat. Ensure the tape is firmly pressed on the nail to cover the space between the tip and the nails completely.
- Apply the white polish to the ¼ part of the nail that is exposed. Do the same to every other nail. The pressed tape makes the border crisp and neat.
For a crisp French Manicure, be patient with the drying of the white polish lest it peels off leading to a messy job.
Then, gently peel the tape off.
Finally, give the white tip a glassy finish by applying the top coat all over the nail.
Method 2: Use An Elastic Band
There are many ways to kill the French manicure rat. If the scotch tape doesn’t work for you, it’s time you try the rubber band method. So, can you perfect the art of doing a classy French manicure? See:
The requirements
- White nail polish
- A rubber band
- Basecoat
- Top coat
Step By Step guide;
1. Apply Your Base Coat
Apply a thin layer of either tan color or sheer pink base coat. A layer of two is enough. You want to work on an excellent canvas, so let the base coat dry before you proceed to do the tips.
2. Paint the Tips
Knot the rubber bands in such a manner that you get two loops. Anchor the rubber on your thumb while the other circuit goes around your nail. Leave a gap at the top of the nails for the white nail polish
3. Do Your Tips
Since the bands are to ease your getting a perfectly shaped tip, carefully paint the tips with a white nail polish aligning to the rubber bands.
4. Remove the Elastic Band
Similarly to the scotch tape, one wrong step and you will peel off the base coat. Therefore, allow time for the polish to dry up completely before pulling off the rubber band. When it comes to pulling off the rubber band, pull outwards after lifting off the nail surface.
5. Apply the Top Coat
Polish up the French manicure look with a top coat whose primary purpose is to seal and protect the manicure. A top layer is an assurance your nail design will last longer
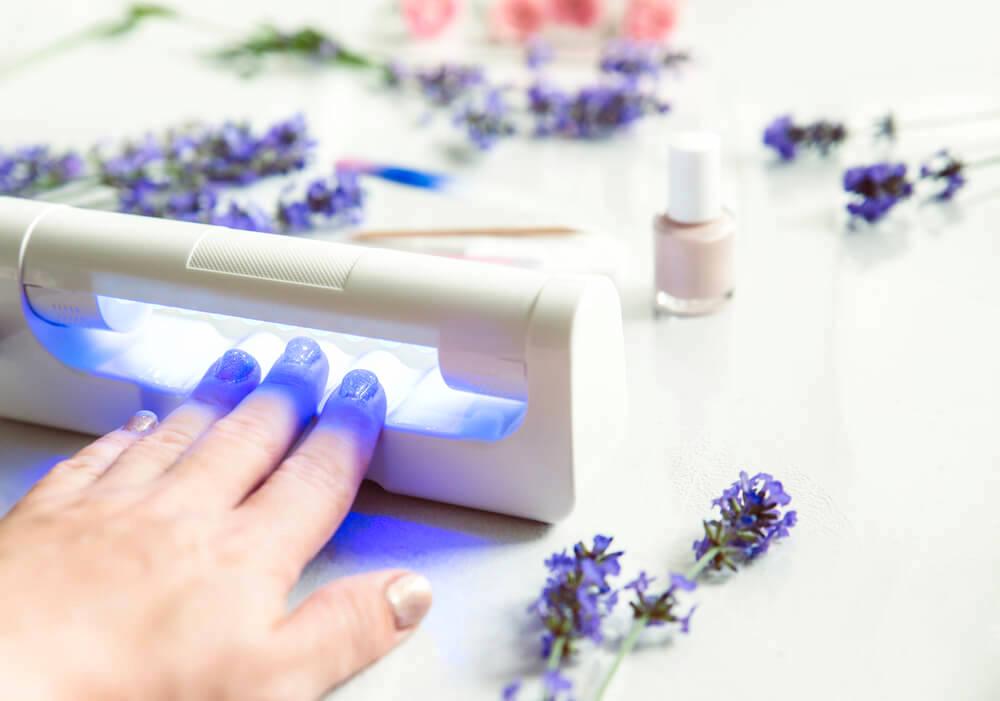
DIY Gel French Manicure
Give yourself a treat by doing the salon-quality, French gel manicure on your nails. The gel design is, however, a costly option since it requires a little more stuff like the LED lamp, Gelish foundational gel, and lint-free alcohol wiper
You can buy your own gel French manicure kit from Gelish and do a salon-quality French manicure right at home. You also need to have an LED light to cure the polish.
How to go about it:
- Prepare Your Nails
As is the case with all the above procedures, the first step involves filing and buffing your nails. Upon completion, wipe the nail surface with the lint-free alcohol, to get rid of any oils, moisturizers or leftover old polishes. The cleaning creates a better bond between the French manicure and the nails
- Apply Your Foundation
Spread a thin layer of the foundation bas e gel polish on your nails after which you treat the polish for at least 30 seconds in the LED light.
- Polish Your Tips
After the drying of the foundation, polish your nail tips using the white gel polish. Apply the polish with soft, even strokes from the sides and also, from the nail base outwards.
Is shaping the tips giving you a hard time? Use the rubber band, band-aid or tape to get perfect the shape of the nail tips. After polishing the tips, expose them to the LED light for 30 seconds.
- It’s Time for your Top Coat
Are your tips done and dry? Give the polish a radiant look by applying the gel top coat after which you cure the nails in your LED lamp
How to Jazz Up the Classic French Manicure
There is no limitation to how artistic you can get, at least not with the French manicure. The French design has evolved from the traditional white tipped, pale pink manicure to today’s fancy French tweaks such as reversed French manicure which uses brighter color shadesof green, red, purple or blue together with different polish for the tips. Instead of a crescent-shaped tip, you get crescent-shaped base of the nail.
Here’s how you do a Reversal French Manicure:
What You Will Need
- Basecoat
- A light contrasting shade of nail polish
- A darker shade of nail polish
- Top coat
Steps
1. Apply Your Base Coat
Apply a thin film of base coat over your nails. Why apply a base coat?It creates an excellent canvas for nail polish to stick for longer. Secondly, your nails get protection from staining and peeling of the manicure.
2. Apply the First Nail Color of Your Choice
Since you are out to break the French manicure rules, apply your favorite shade of nail polish. Nobody cares what color it is, whether sheer, metallic, nude, etc. polish a thin, even, layer on your nails
3. Spice It Up
You can spice the base color with your second one. Apply a little polish which should match the shape of your cuticles. Since we are tweaking the old French design, let the first color show at your nail bed
4. Apply Your Top Coat
Finish the reversal manicure with a transparent top coat. The top coat not only gives the polish a Parisian polish but also increases its durability.
Are you bored by the peachy, white-tipped nail art? It’s time you tried the following variations;
- Instead of the typical full tip coverage, on a steady hand, press tape diagonally on your nail such you paint different shades of polish on each side.
- Have you tried the double moon? Here you let the bold base color show at the tip and the base of your nail while your topcoat covers the other parts.

- How about a double French? Instead of the single white tipped nail, you create double crescent shapes, each with a different bold nail polish that perfectly contrasts the base coat.
- Gradual tips;here you use a sponge. To get the perfect twitch to try it out with yellow polish which you apply on top of a subtle or light base coat. The yellow polish color density decreases from the tips towards the nail base. It, however, doesn’t reach the bottom.
Quick Tips for a Long-Lasting Manicure
- Clean your nails using white vinegar to remove dirt before the base
- Shape your nails to match your cuticles, and prevent your nail breaking.
- Apply thin coats and give them ample time to dry up.
- Remember to add a top coat for the shine and longevity of your polish
- Towel-dry your hands after doing house chores. You should do the cleaning in gloves.
- Apply the top coat to almost-dry nail polish.
So, what’s hindering you from doing the perfect French manicure? Doing your nails is such a fulfilling experience and one which saves you some bucks and time. Whether you choose to go with the classic peachy, white tipped manicure or its variations thereof, the perfect French manicure is a worth learn because the skill not only saves you from chipped, dull and broken nails but also helps you to create a unique look.


Leave A Comment